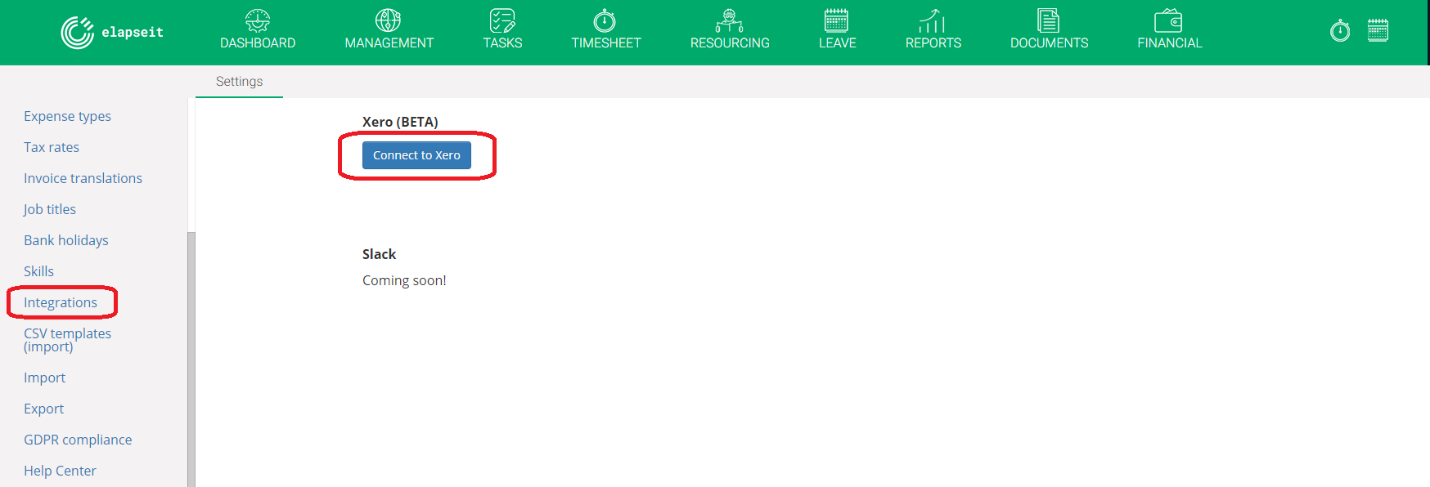
A. How to connect elapseit with Xero
1. Go to Settings => Integrations and click on Connect to Xero button;
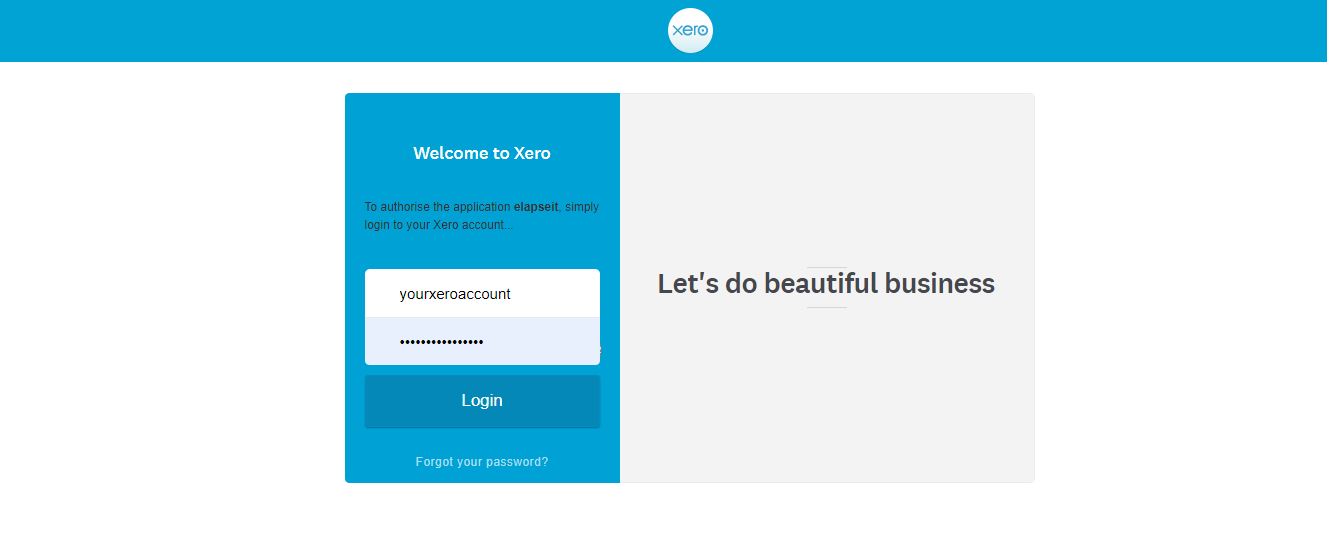
2. You will be redirected to Xero where you will need to login with your Xero credentials (if you are already connected to Xero, in the current browser session, you will be taken directly to step 3);
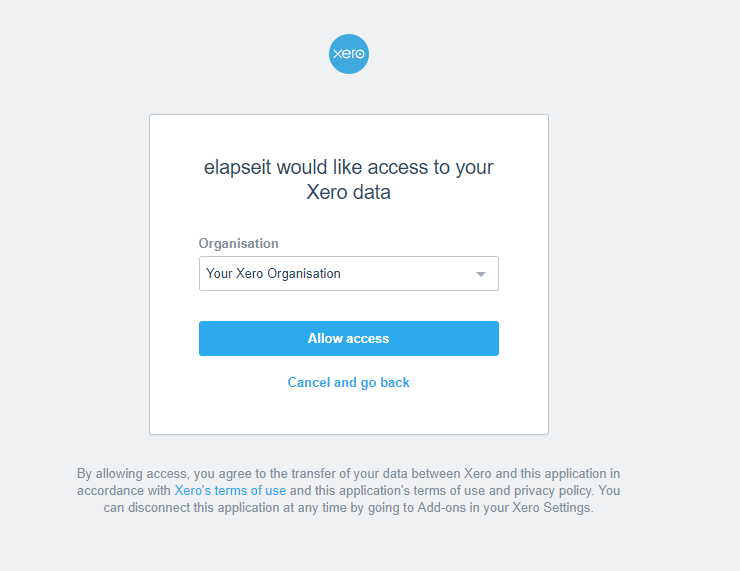
3. Once authenticated, Xero will ask you if you want to allow elapseit to access your Xero data.
B. Configuring elapseit to work with Xero
1.Once connected to Xero, elapseit will display to what Xero Organisation you are connected to;
2. Then, you can select the default Xero Sales account where the elapseit invoices will be copied to;
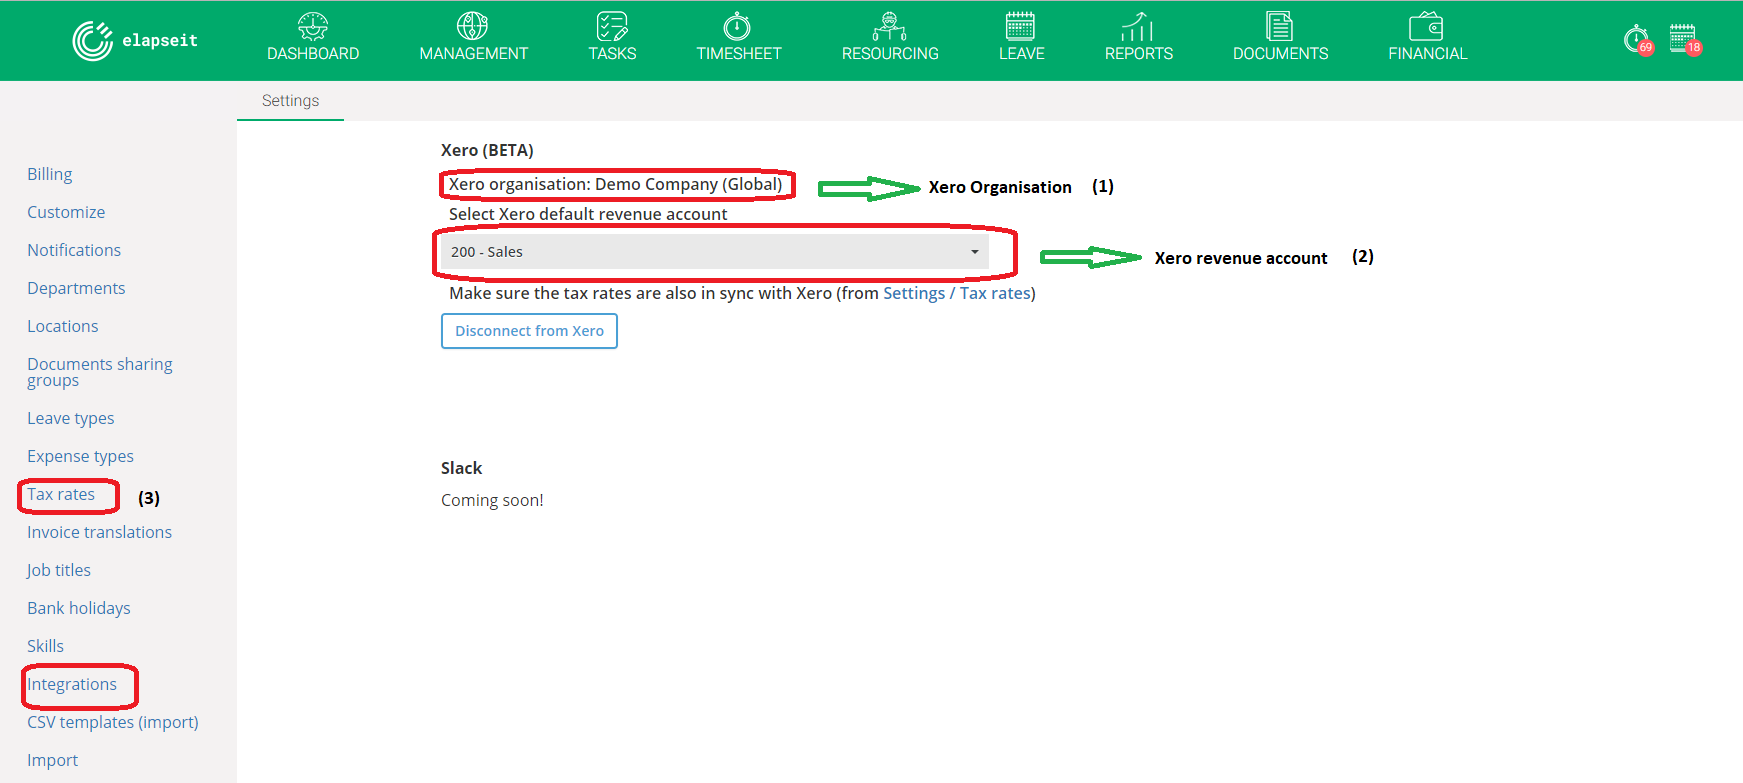
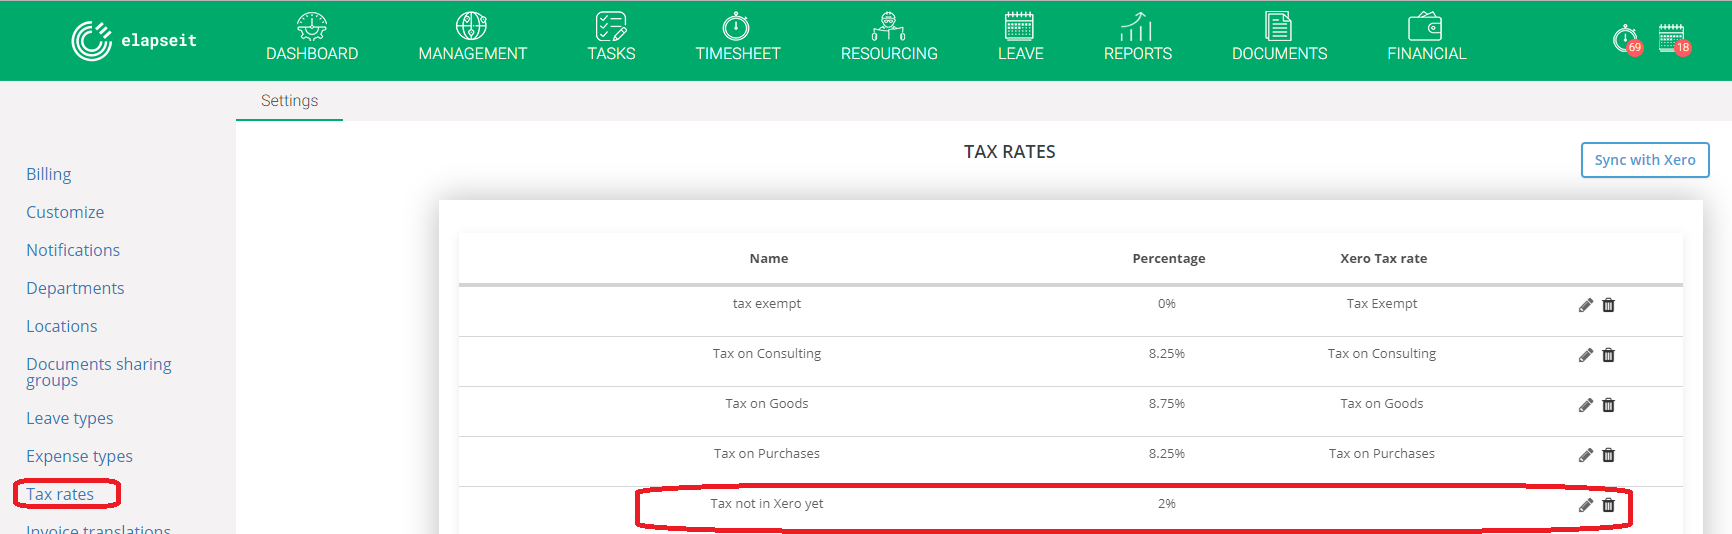
3. Next you will need to make sure your tax rates are in sync with Xero tax rates (in elapseit you have to go to Settings => Tax rates). This section contains:
a) The tax rates set in elapseit;
b) A column (Xero Tax rate) showing which tax rate is already sync with Xero;
c) A button to Sync the taxes with Xero.
In the example below, the last rate is only in elapseit, it was not synchronized with Xero yet.
4. When clicking Sync with Xero button, we will make sure that the same taxes are available in both systems:
a) We will create in Xero the taxes that exist only in elapseit;
b) We will create in elapseit the taxes that exist only in Xero;
c) We will merge the taxes found in both system with the same name.
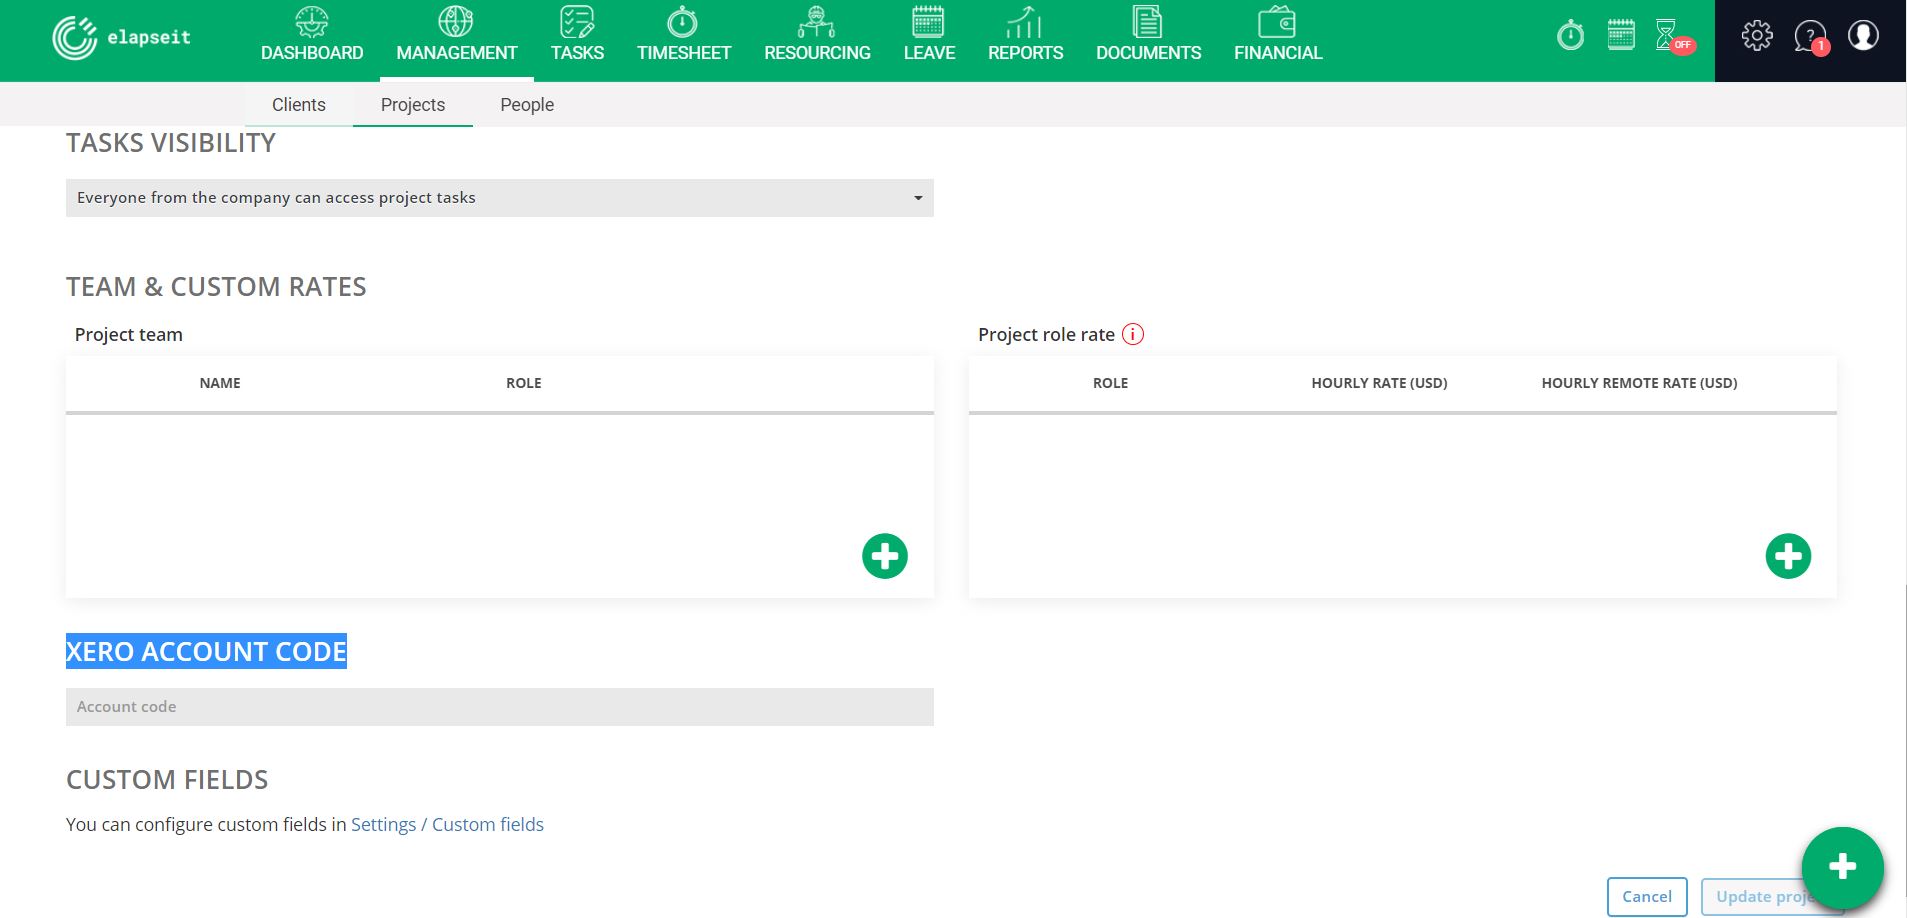
5. When you are connected to Xero, in Management/Projects when editing a project, you will have a new field where you can, optionally, set a Xero account code. This code will be useful when sending invoices from elapseit to Xero.