How to import and export data
It is important to know that you can import information regarding Client, Project, Person, Timesheet and Invoice.
Regarding the export, you can export all the information you have in your account (imported or added manually).
Tip: If your account is new and you don`t have any data yet, you can start an export company data job so you can see what information is supported by elapseit; you will also have a CSV template that you can use for import.
A. Create a CSV template
To import data, you have to create a CSV template first. You can configure templates based on the format of your CSV file.
- Go to Settings => CSV templates (import);
- Click on the add button (green button with a plus);
- Add a name and a format date for your template;
- Select template fields – for each category you have to add the mandatory information (marked with a * ), and other needed information if you want to;
- Click Save button.
Tip: When you create a CSV template, be aware of the Date format – the format in the CSV file must be the same as the one you choose for the template.
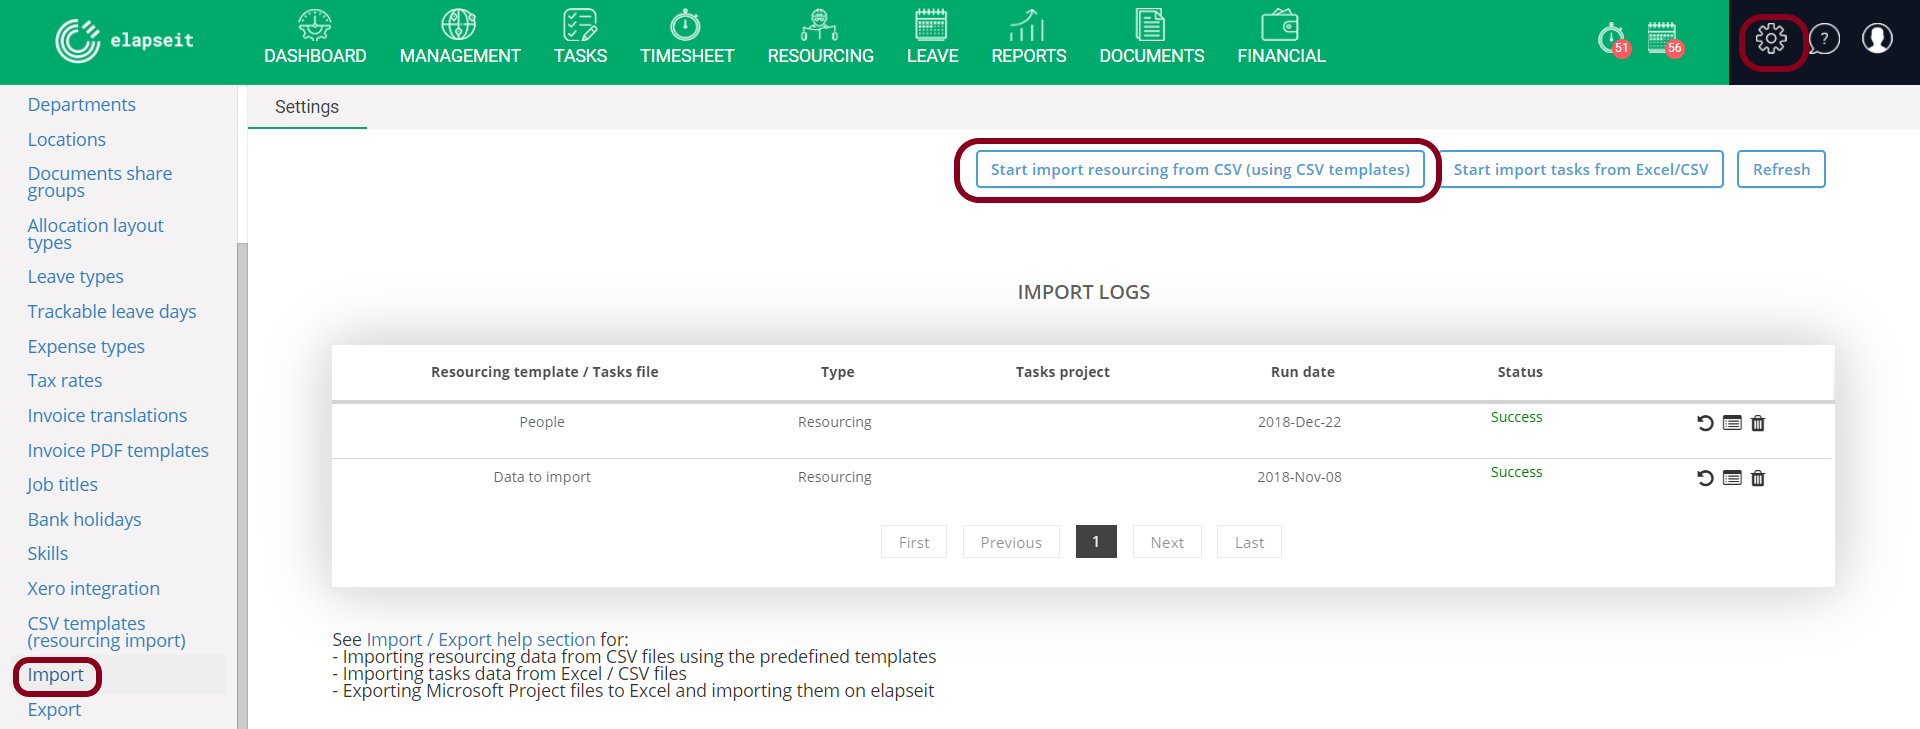
B. Import data using the created template
After you created the template based on your CSV files, you can import the data in elapseit.
- Go to Settings => Import;
- Click on the Start import resourcing from CSV (using CSV templates) button:
-
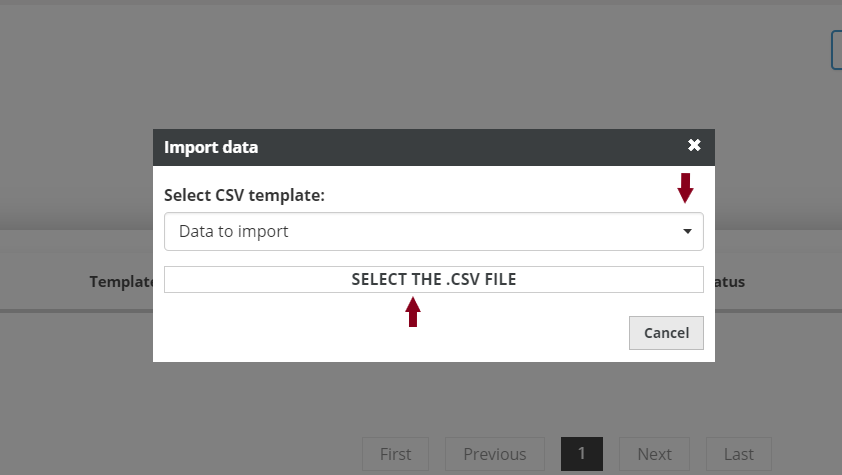
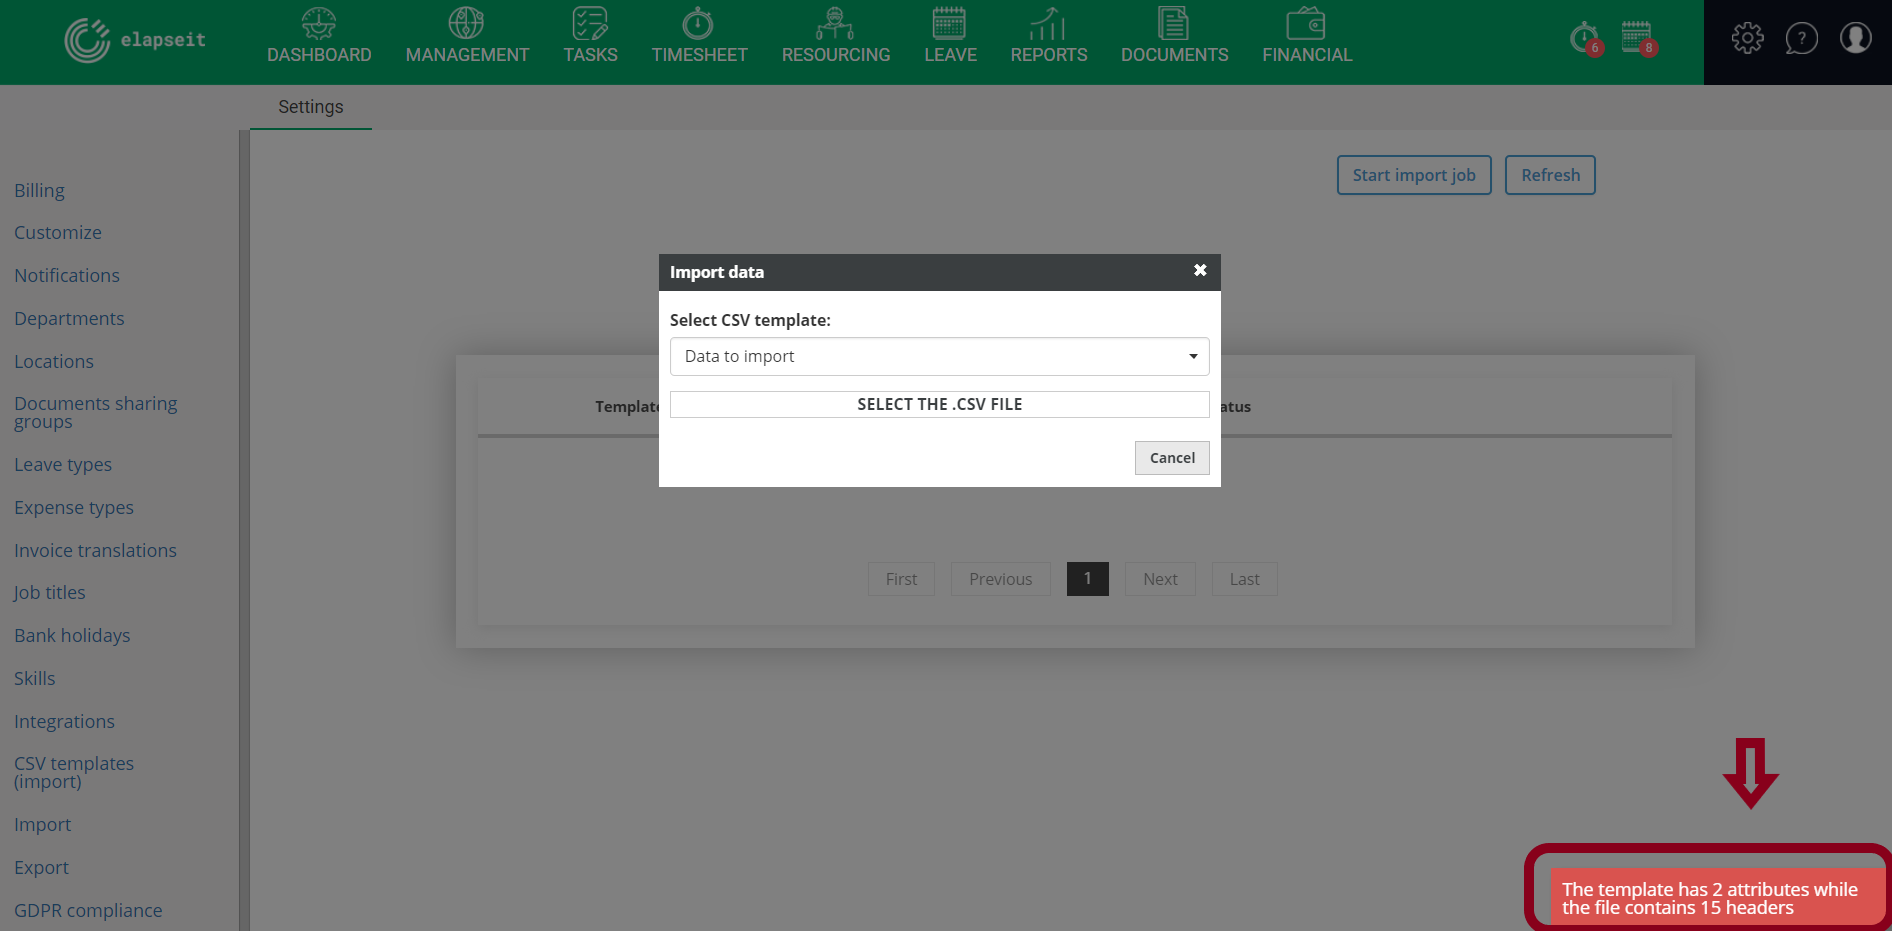
 3. Choose your template from the drop-down list and select the CSV file from your computer;
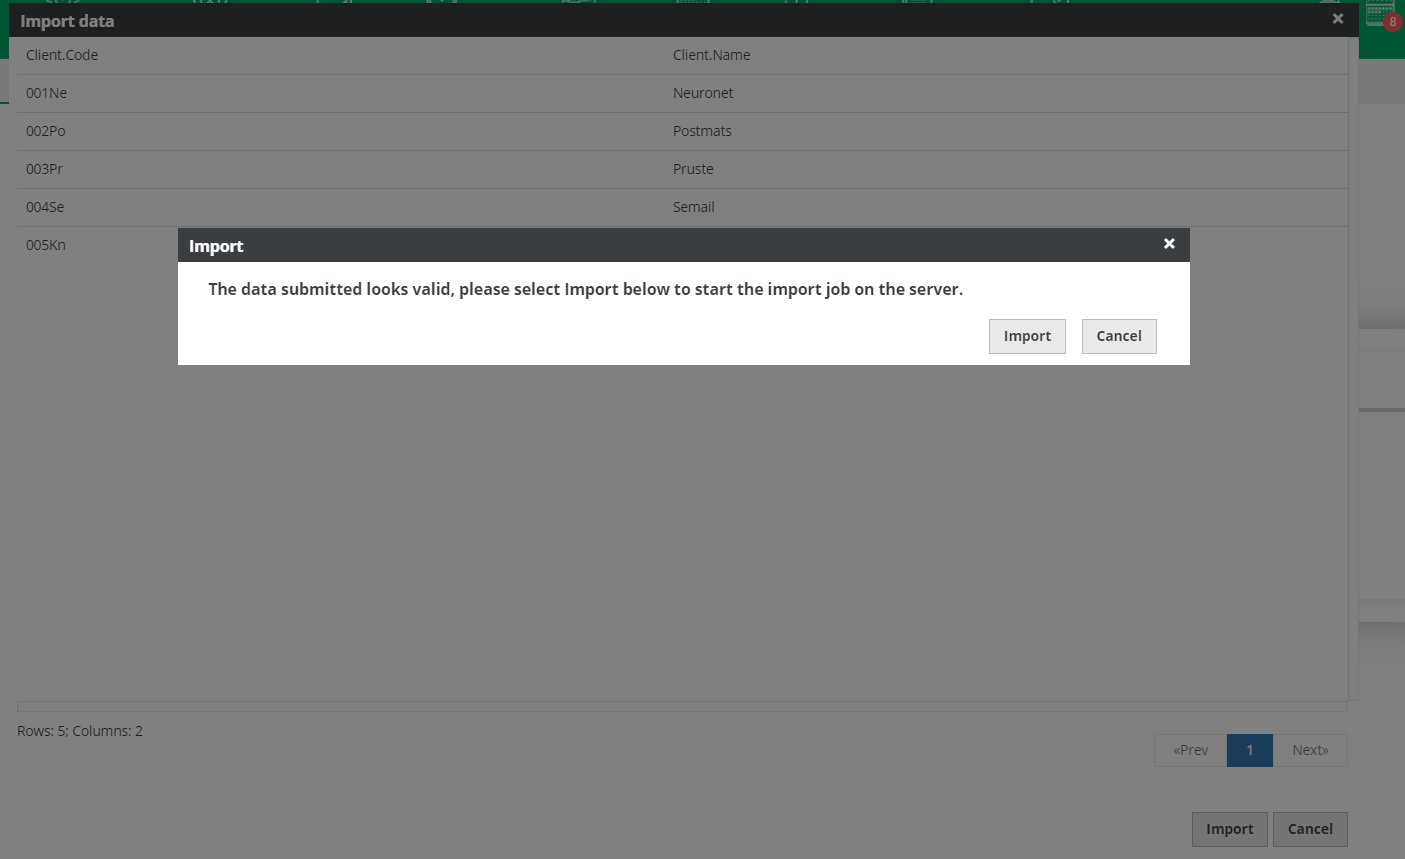
4. After you selected the CSV file, if the created template match with your file, a view with the information will open and you just click on the Import button;
5. If the CSV file that you want to import does not match the created template, a notification will pop-up in the lower right side of your screen;
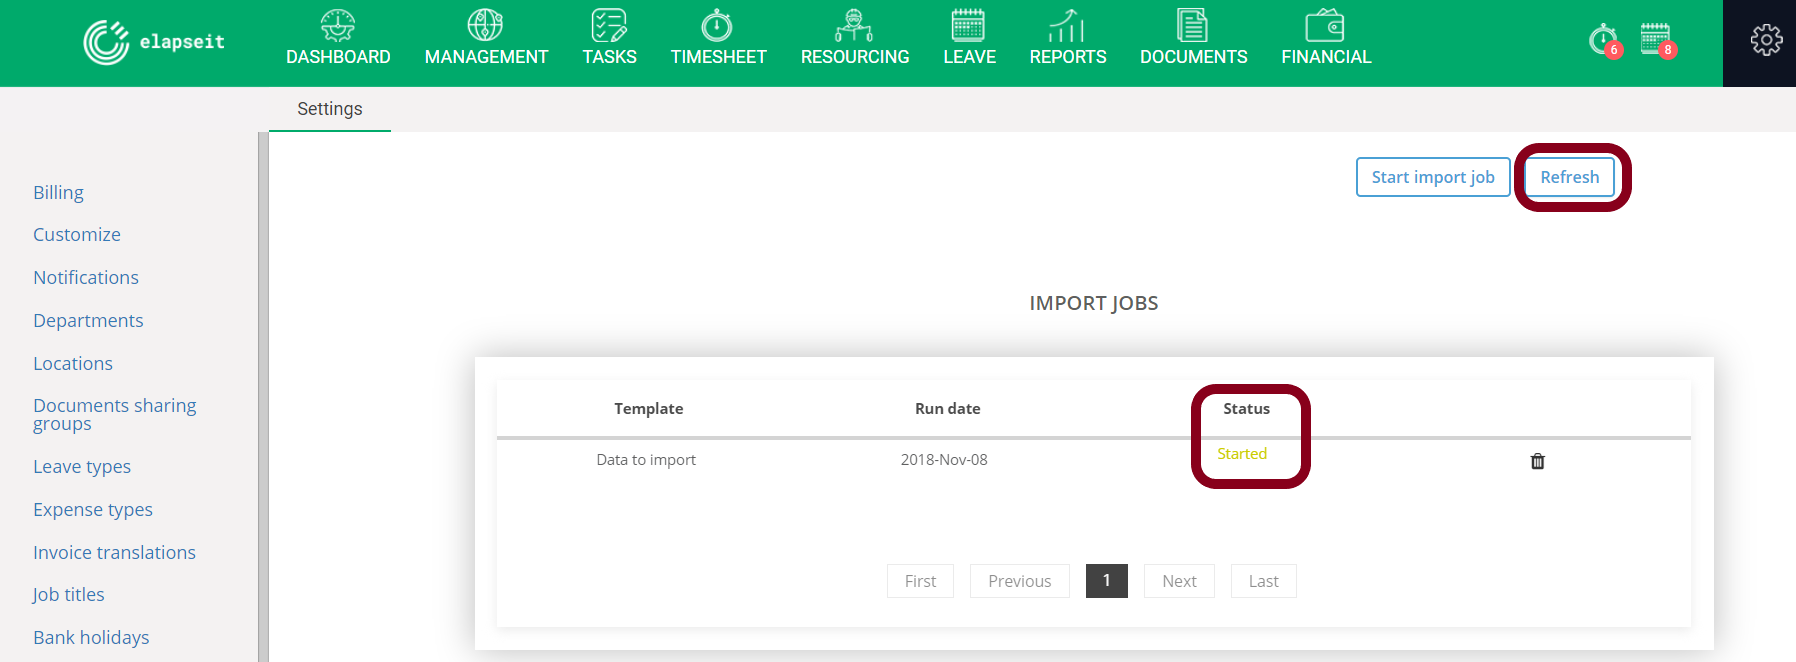
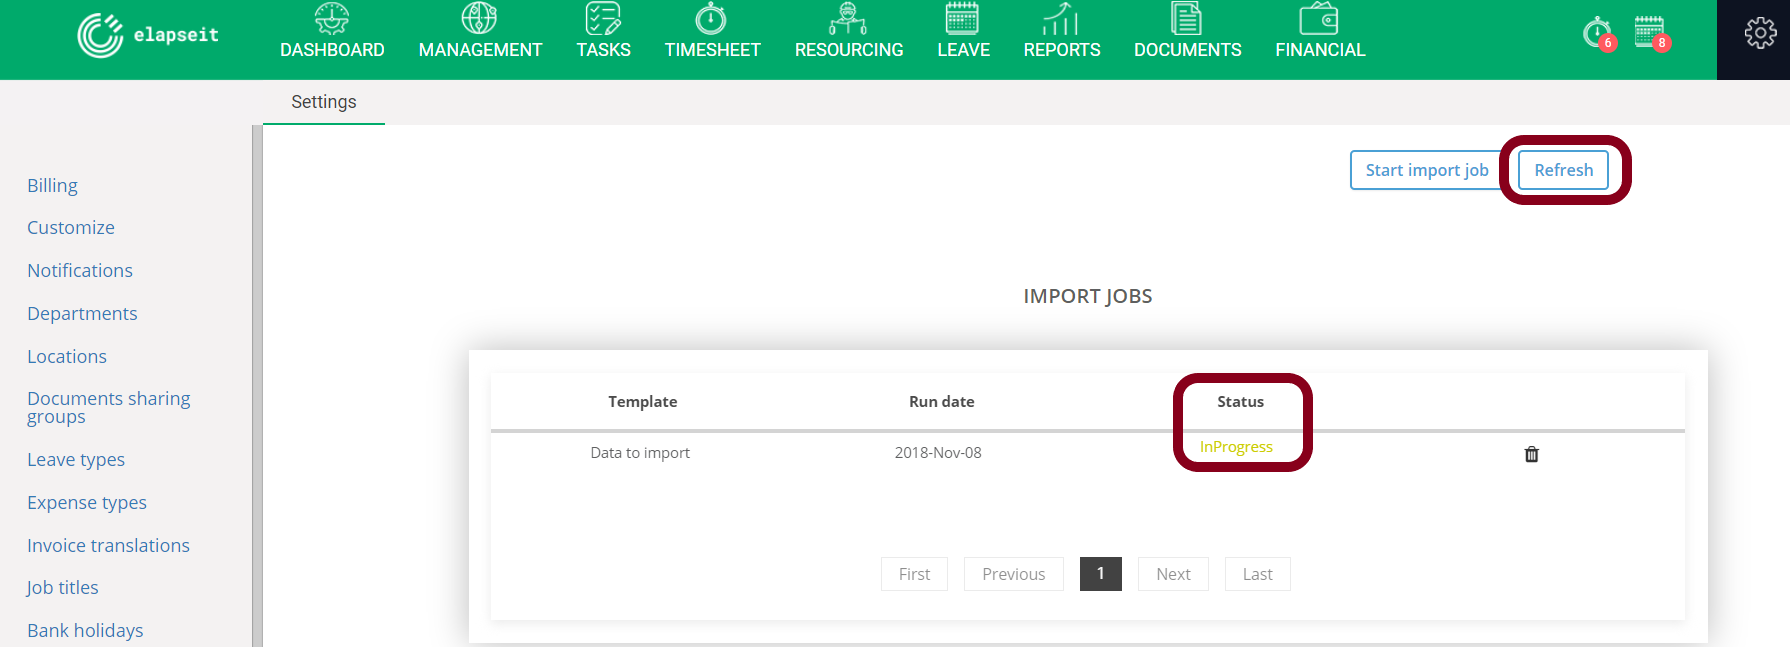
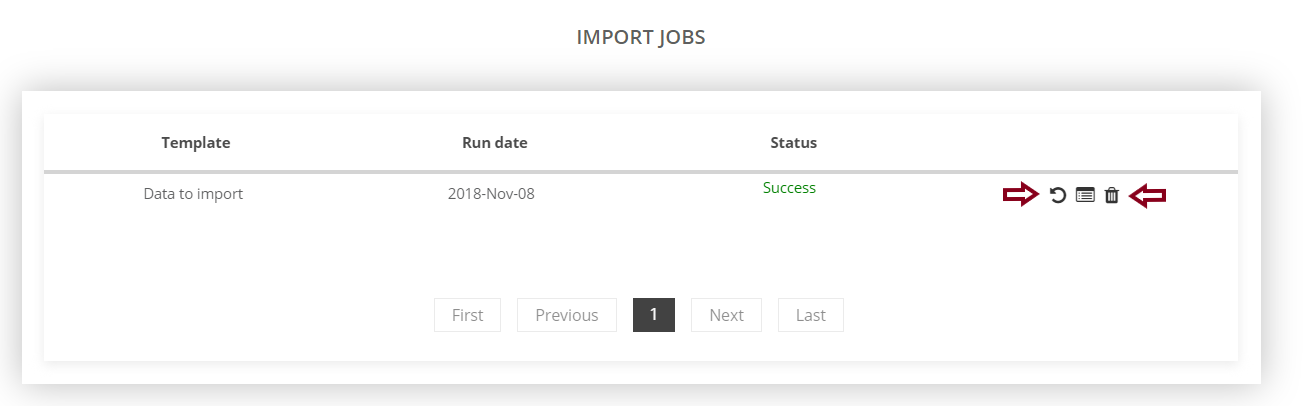
6. After you started the import of the correct file, you need to click on the Refresh button, to see the status of the import (Started => In Progress => Success) – it will take a couple of minutes;
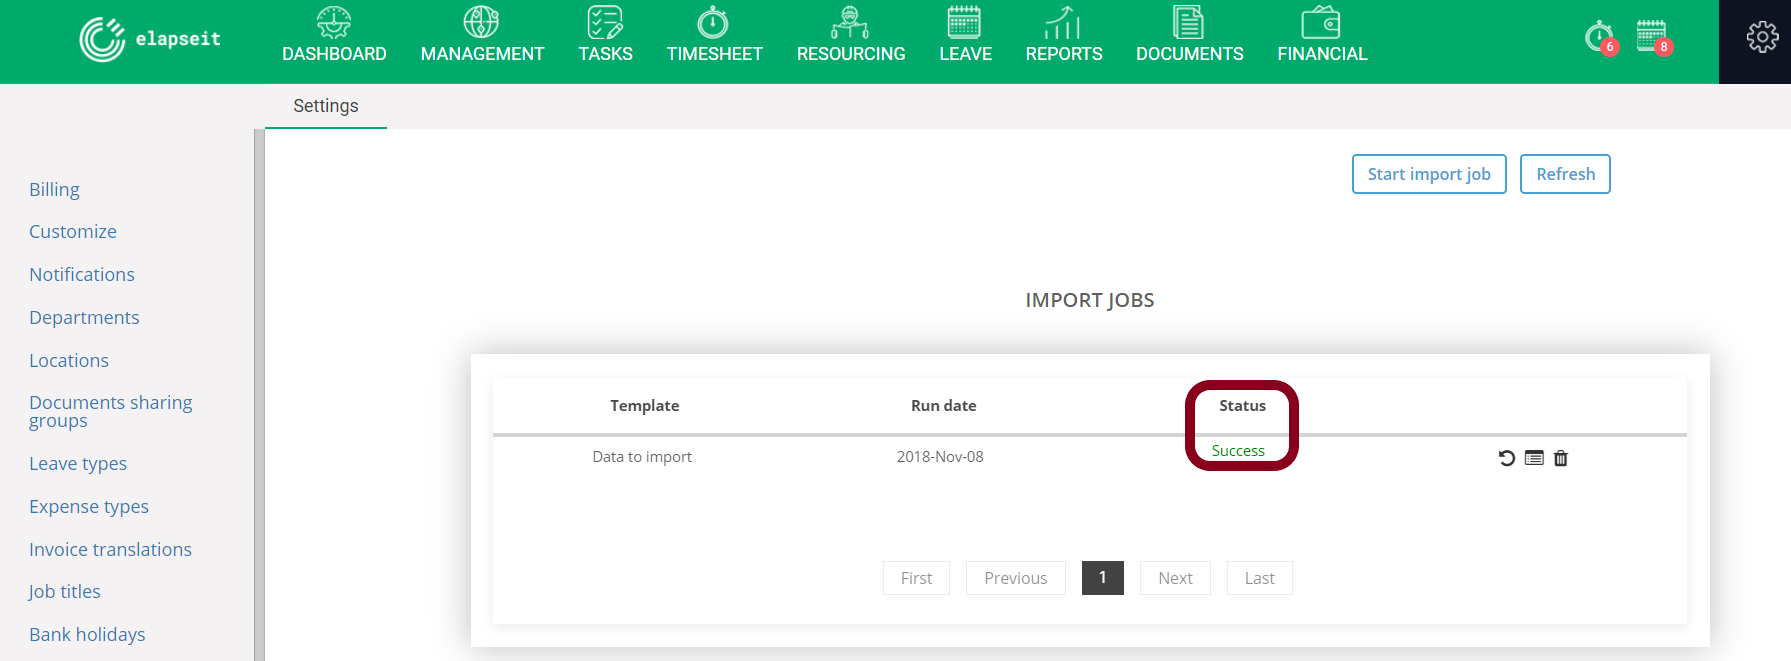
7. When the Import is done, you have the options to rollback or to delete the operation.
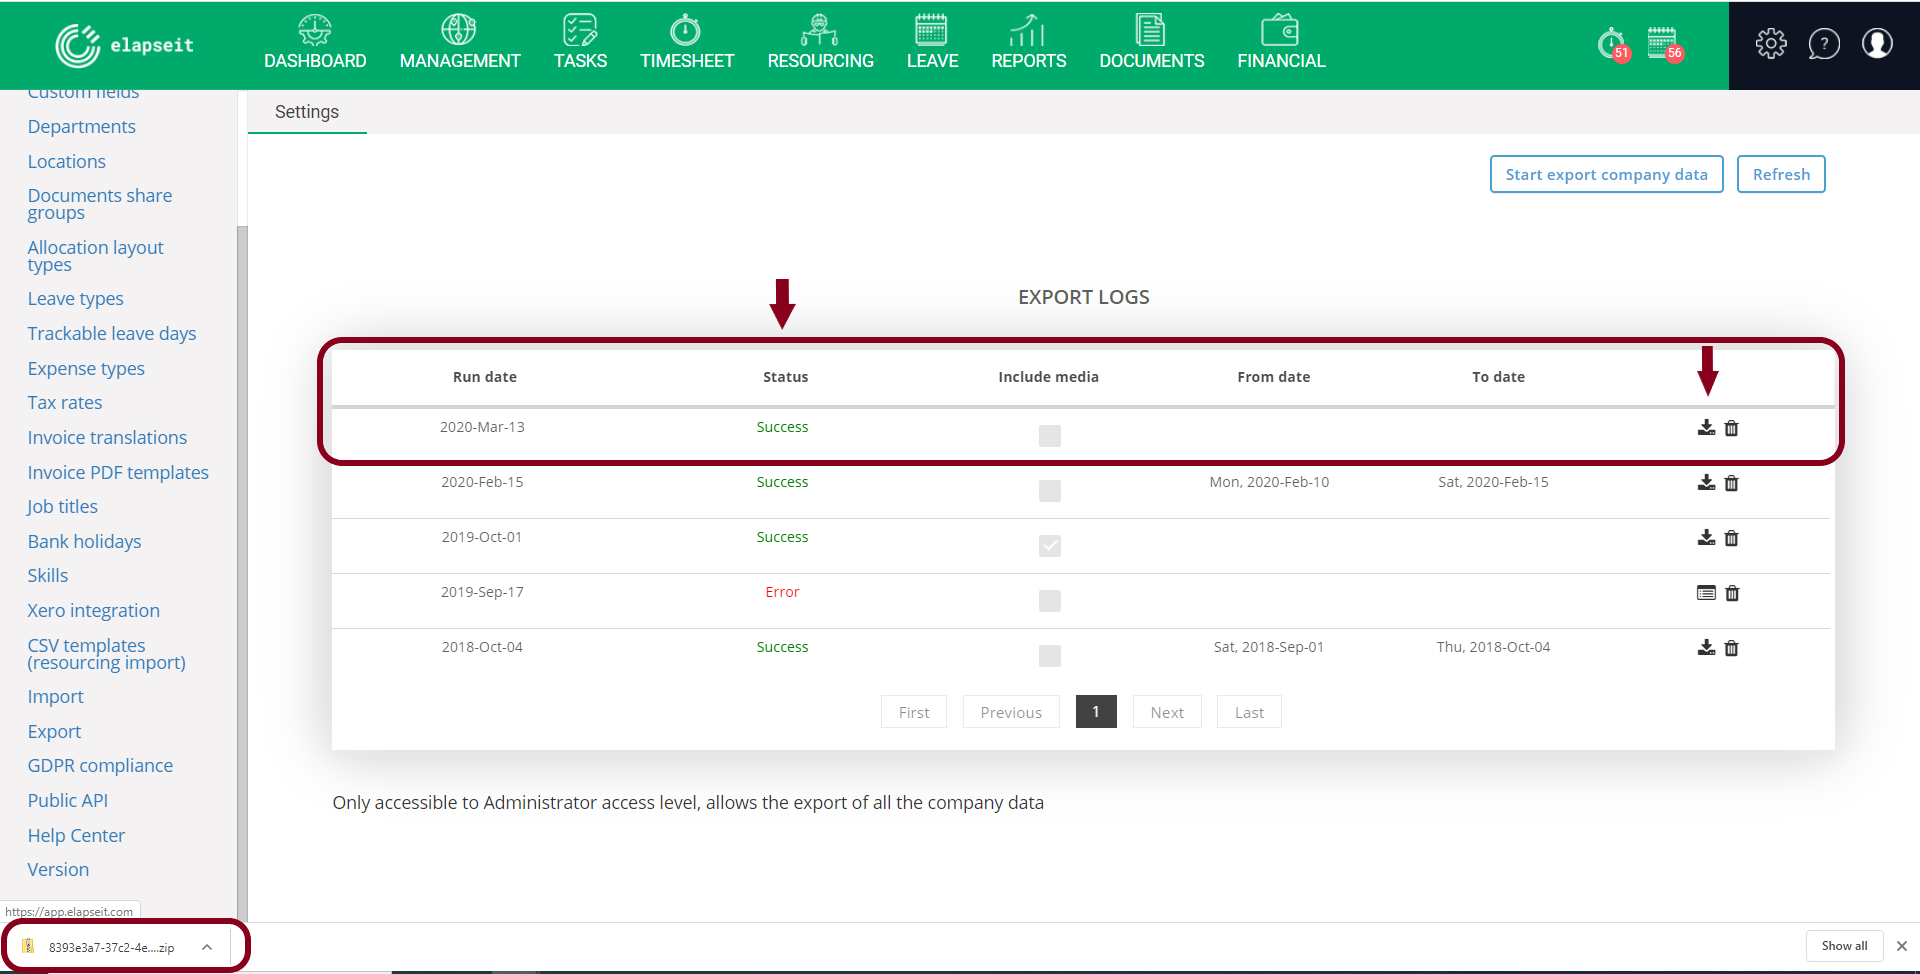
C. Export data
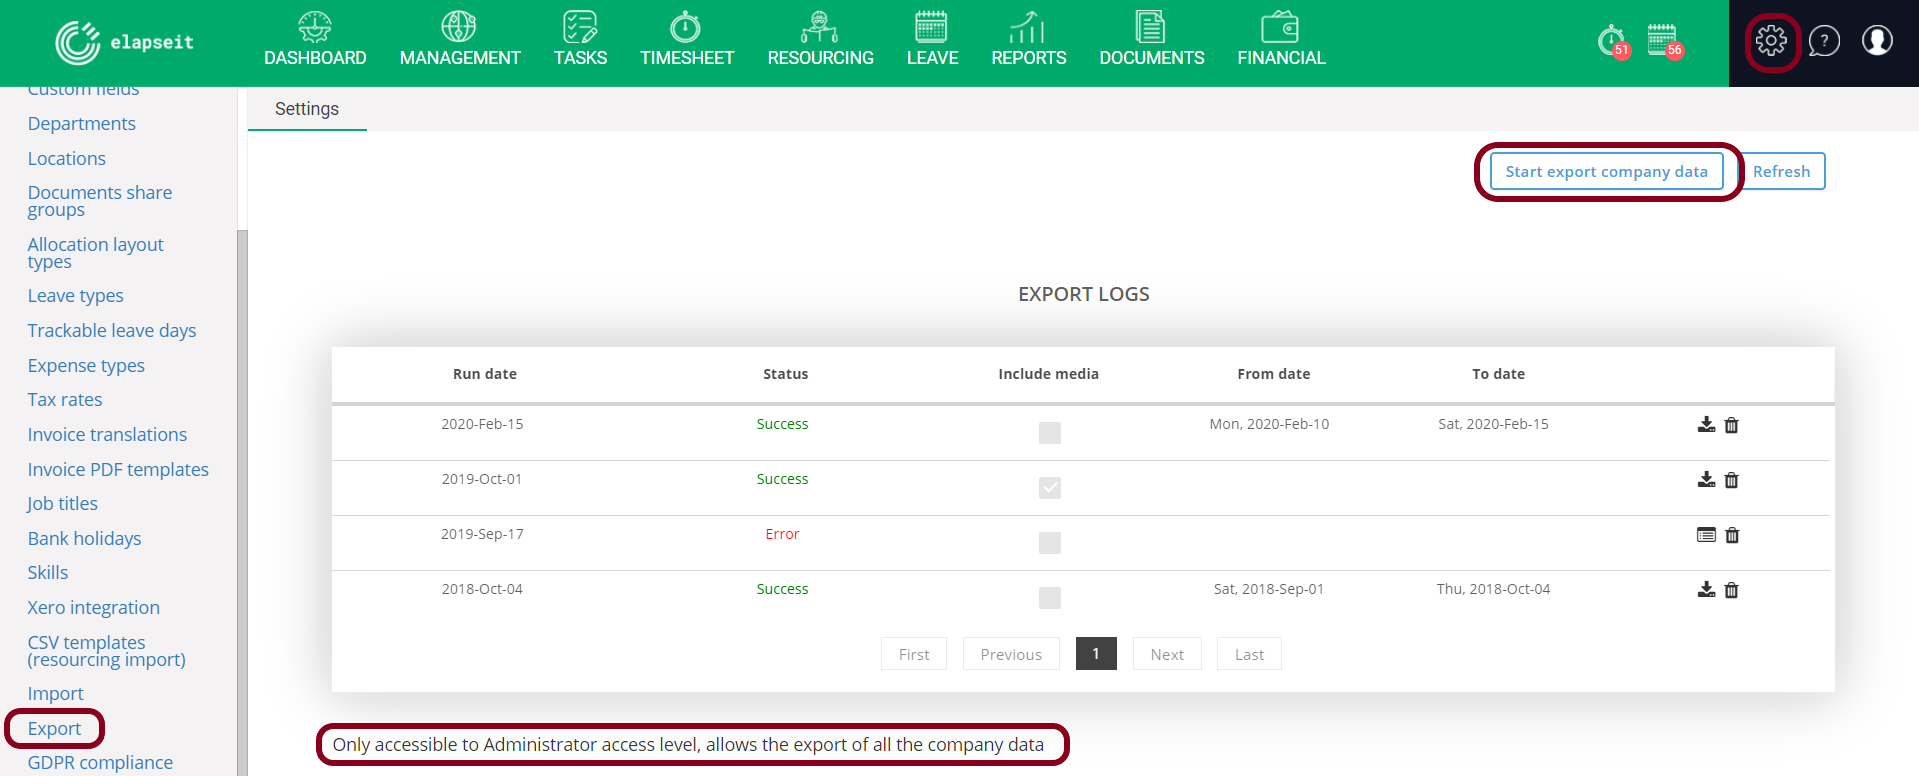
To export your data from elapseit is more than but you have to keep in mind that only the Administrator/ Owner can export all the company data.
- Go to Settings => Export => Start export company data:
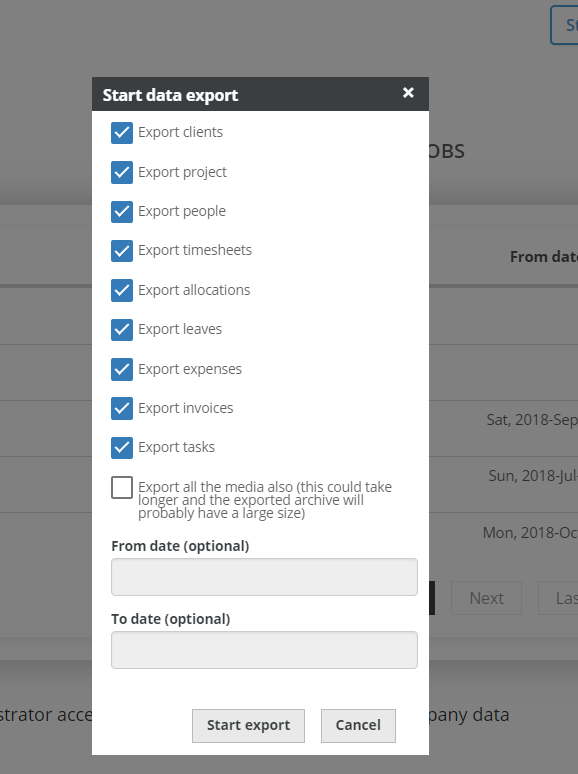
2. A new view will open, where you can choose if you want to export all the information that you have introduced in elapseit (including media and attachments), or you are interested just in some, and you check the corresponding boxes. Also, depending on why you need the data for, you can choose a period of time, and the exported information will contain only the available information in between that period, or, you can skip the start/end date, and in this case the app will export all your company data:
3. After you started the exporting job, you have to click the Refresh button, a couple of times, until the export is done and the download icon will be visible;
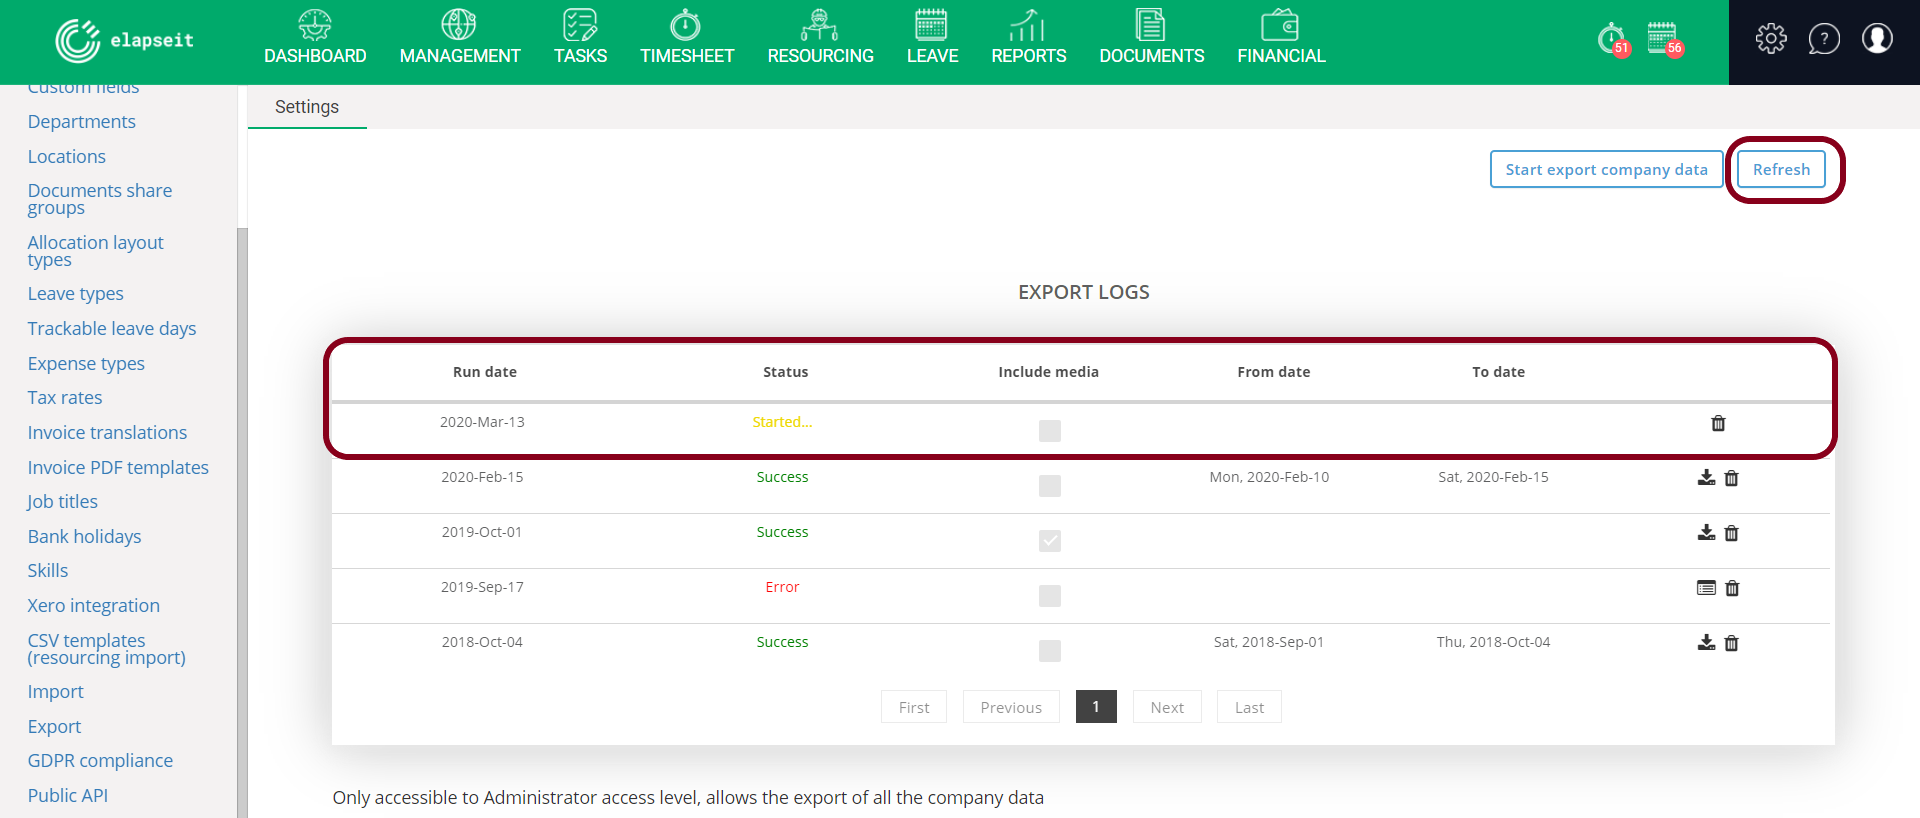 4. Click on the download icon and all the information will be downloaded on your computer as a zip file.