How to add a new client
Adding a client is one of the first steps to getting started. You can either import all the information, check here how, or you can follow the next steps:
- Go to Management section from menu.
- Click on the Add button from the bottom right corner.
- Choose the option – Add client.
The client page has 3 sections and relevant details related to client can be added – mandatory being just the name:
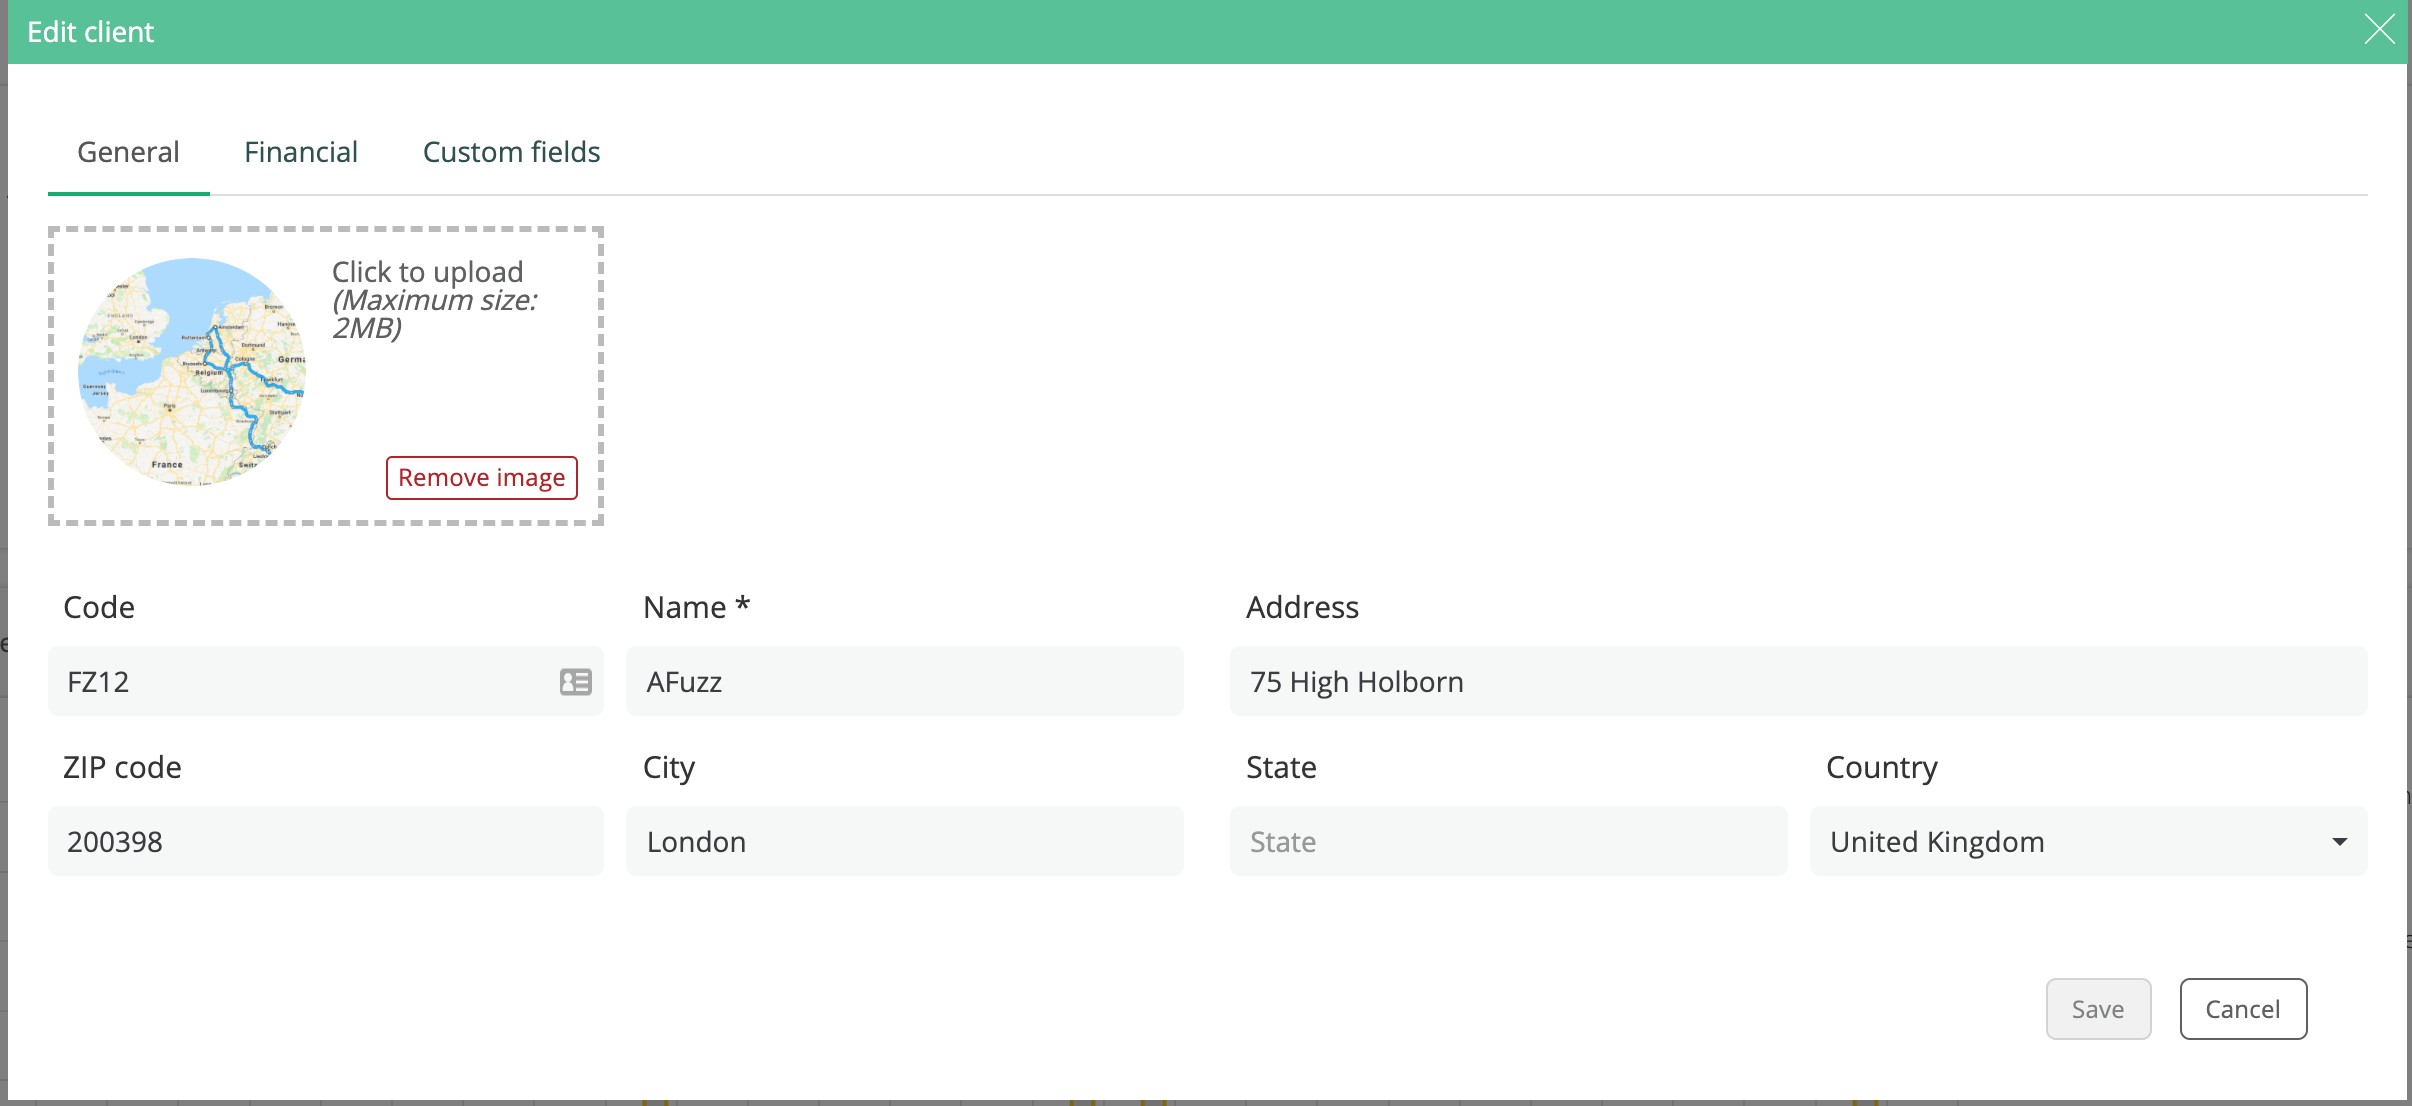
1. GENERAL
- Logo: drag & drop the logo of your client, or any other picture, that will help you identify easily each client in the clients’ list.
- Code: Add the unique code that’s related to the client. This code helps to easily identify the clients throughout the software. If you don’t have an official code for your client, don’t worry, just leave the field empty and the app will automatically create one.
- Name*: Name of your client – this is a mandatory information.
- Address: Address of the client
- ZIP code: Zip code of the client
- City: City of the client
- Country: Country of the client
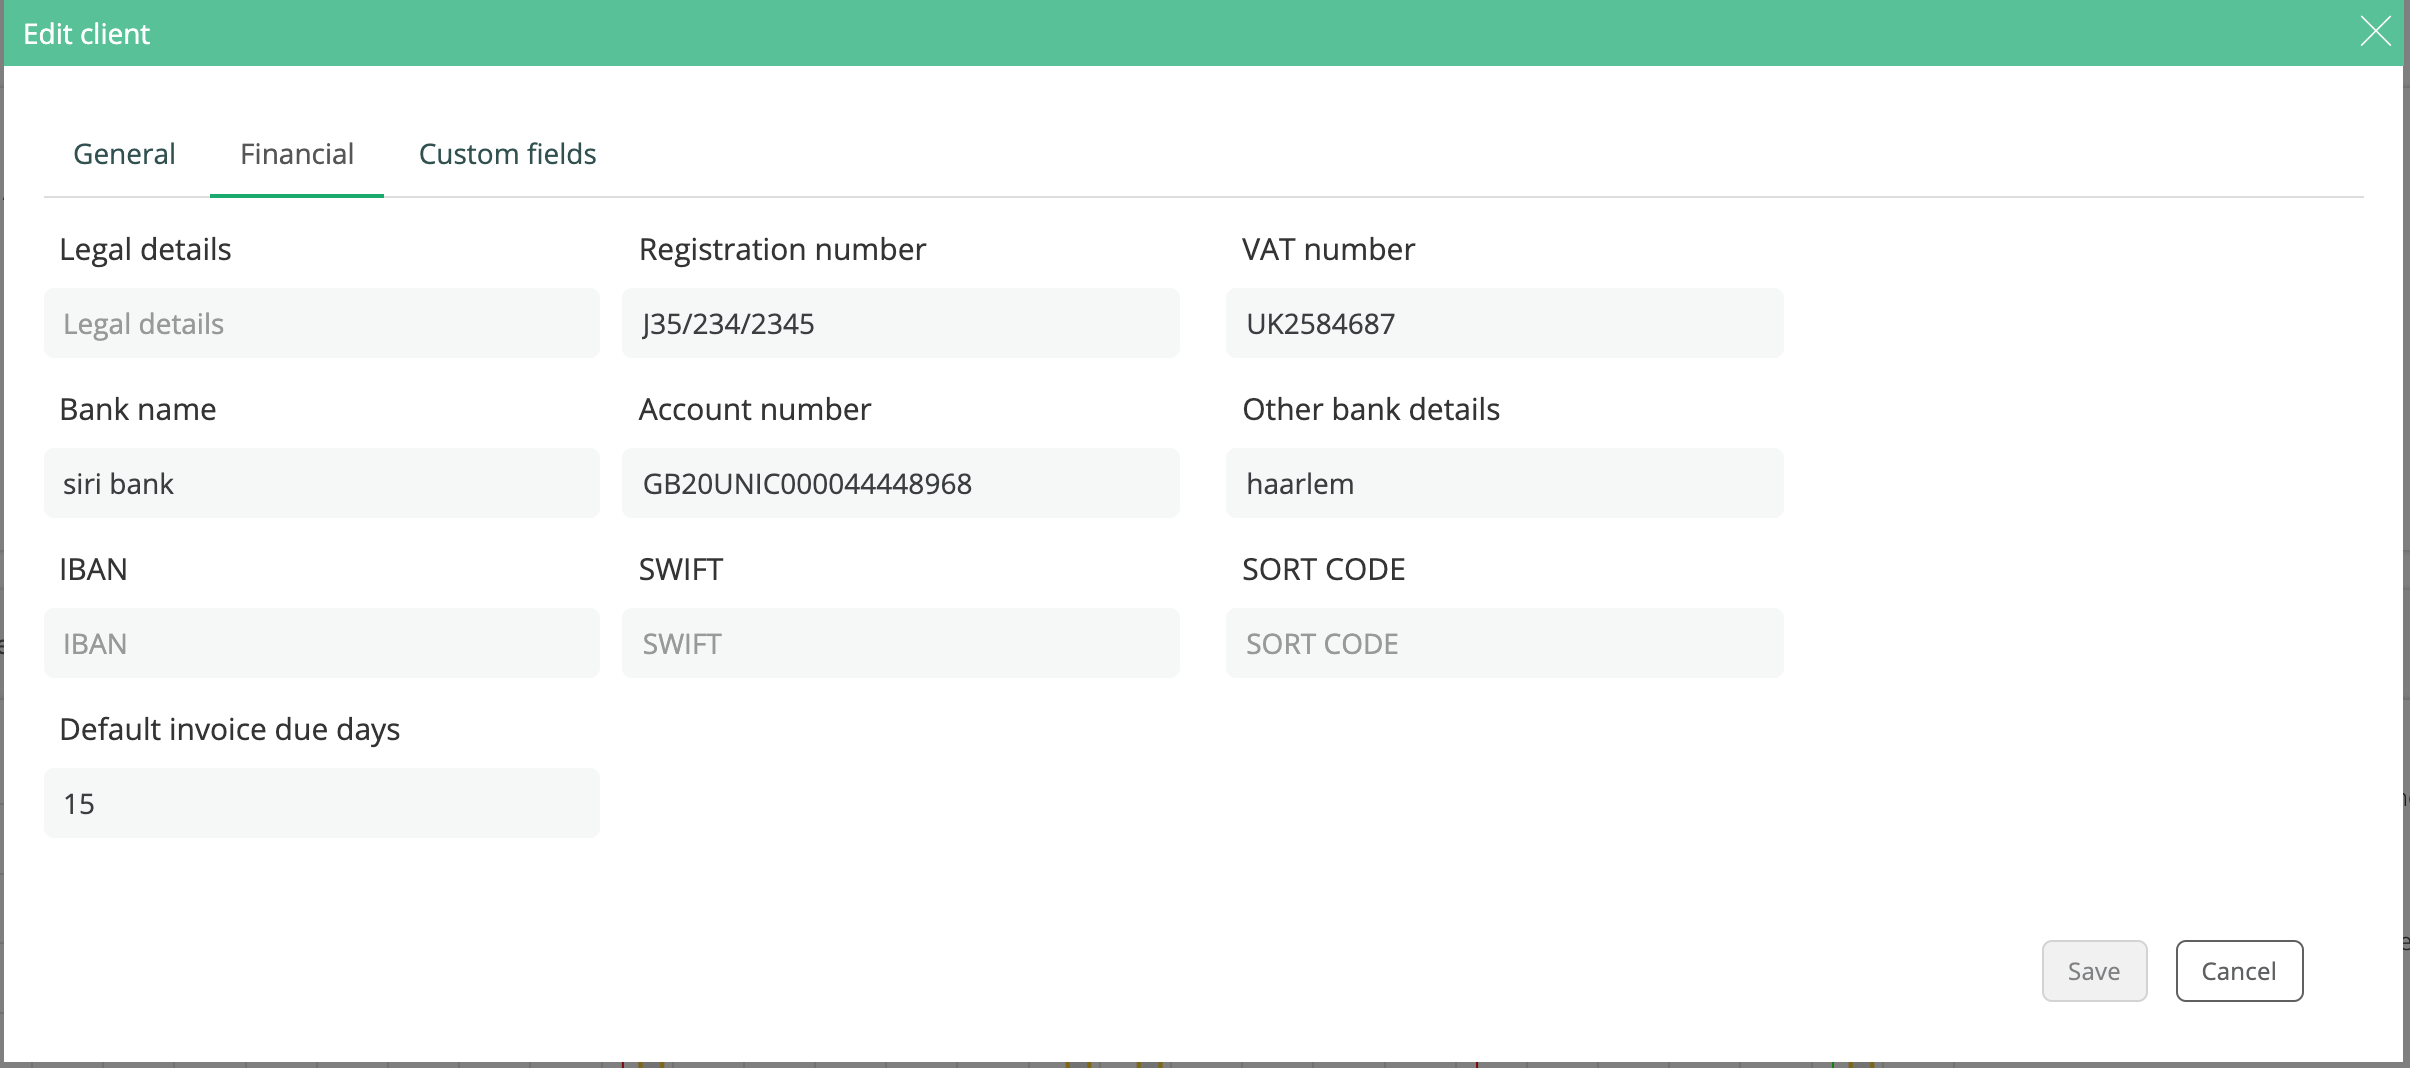
2. FINANCIAL
The information from this tab, will be used for the invoices that you will issue to the client.
- Legal details: The client contract number or any other detail
- Registration number: Registration number of the client
- VAT number: The client VAT number – if from Europe
- Bank name
- Account number
- Other bank details
- IBAN
- SWIFT
- SORT CODE
- Default invoice due days: Add the payment term specific for each client.
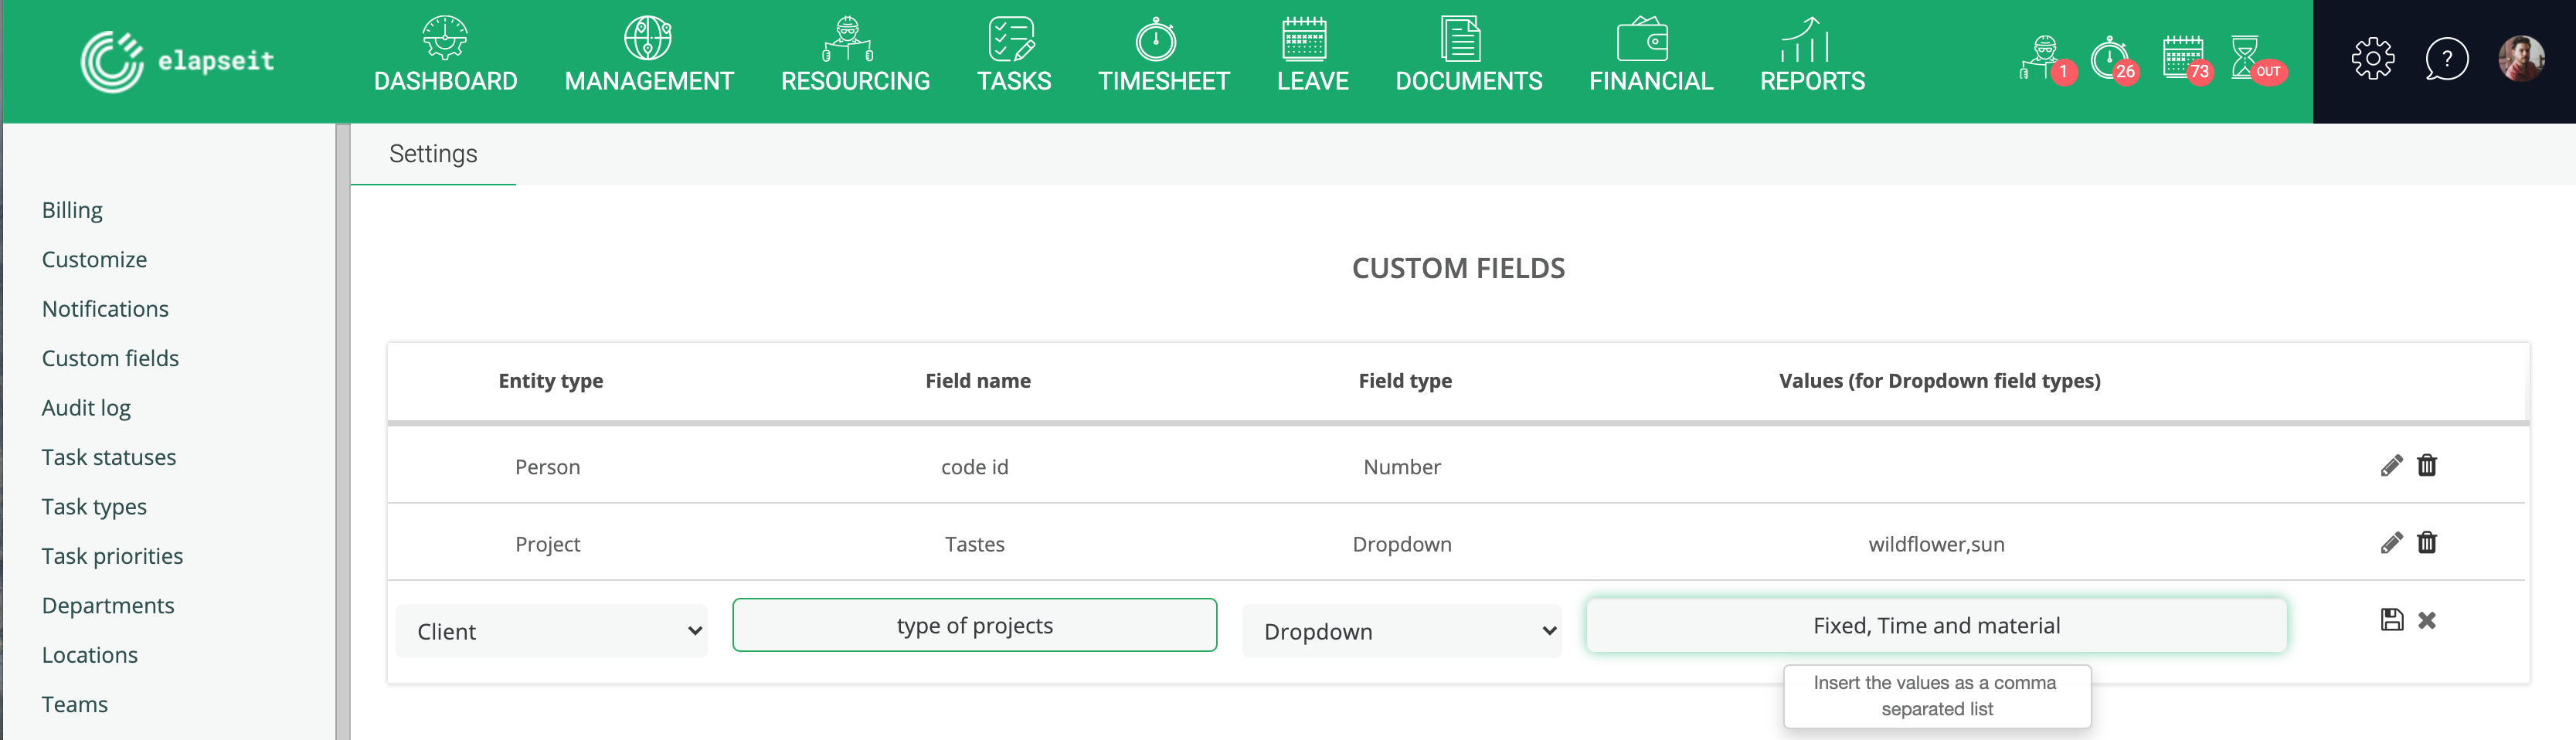
4. CUSTOM FIELDS
You can add custom fields to Clients, Projects, People, by clicking on the link in the page. The link will take you to Settings/Custom fields

After the Client is created and you save all the data in the 3 sections above, you have another 2 sections – not mandatory but very useful in keeping track of all your business with the specific client.
A. CONTACT
Here you can add any contacts related to the client, so you can have all the contact data in a single place. The contacts that you add here can be later chosen, from a drop down list, as the project manager fro the Client side:

Because elapseit offer access to your clients, free of charge, you can choose what kind of contact do you add here:
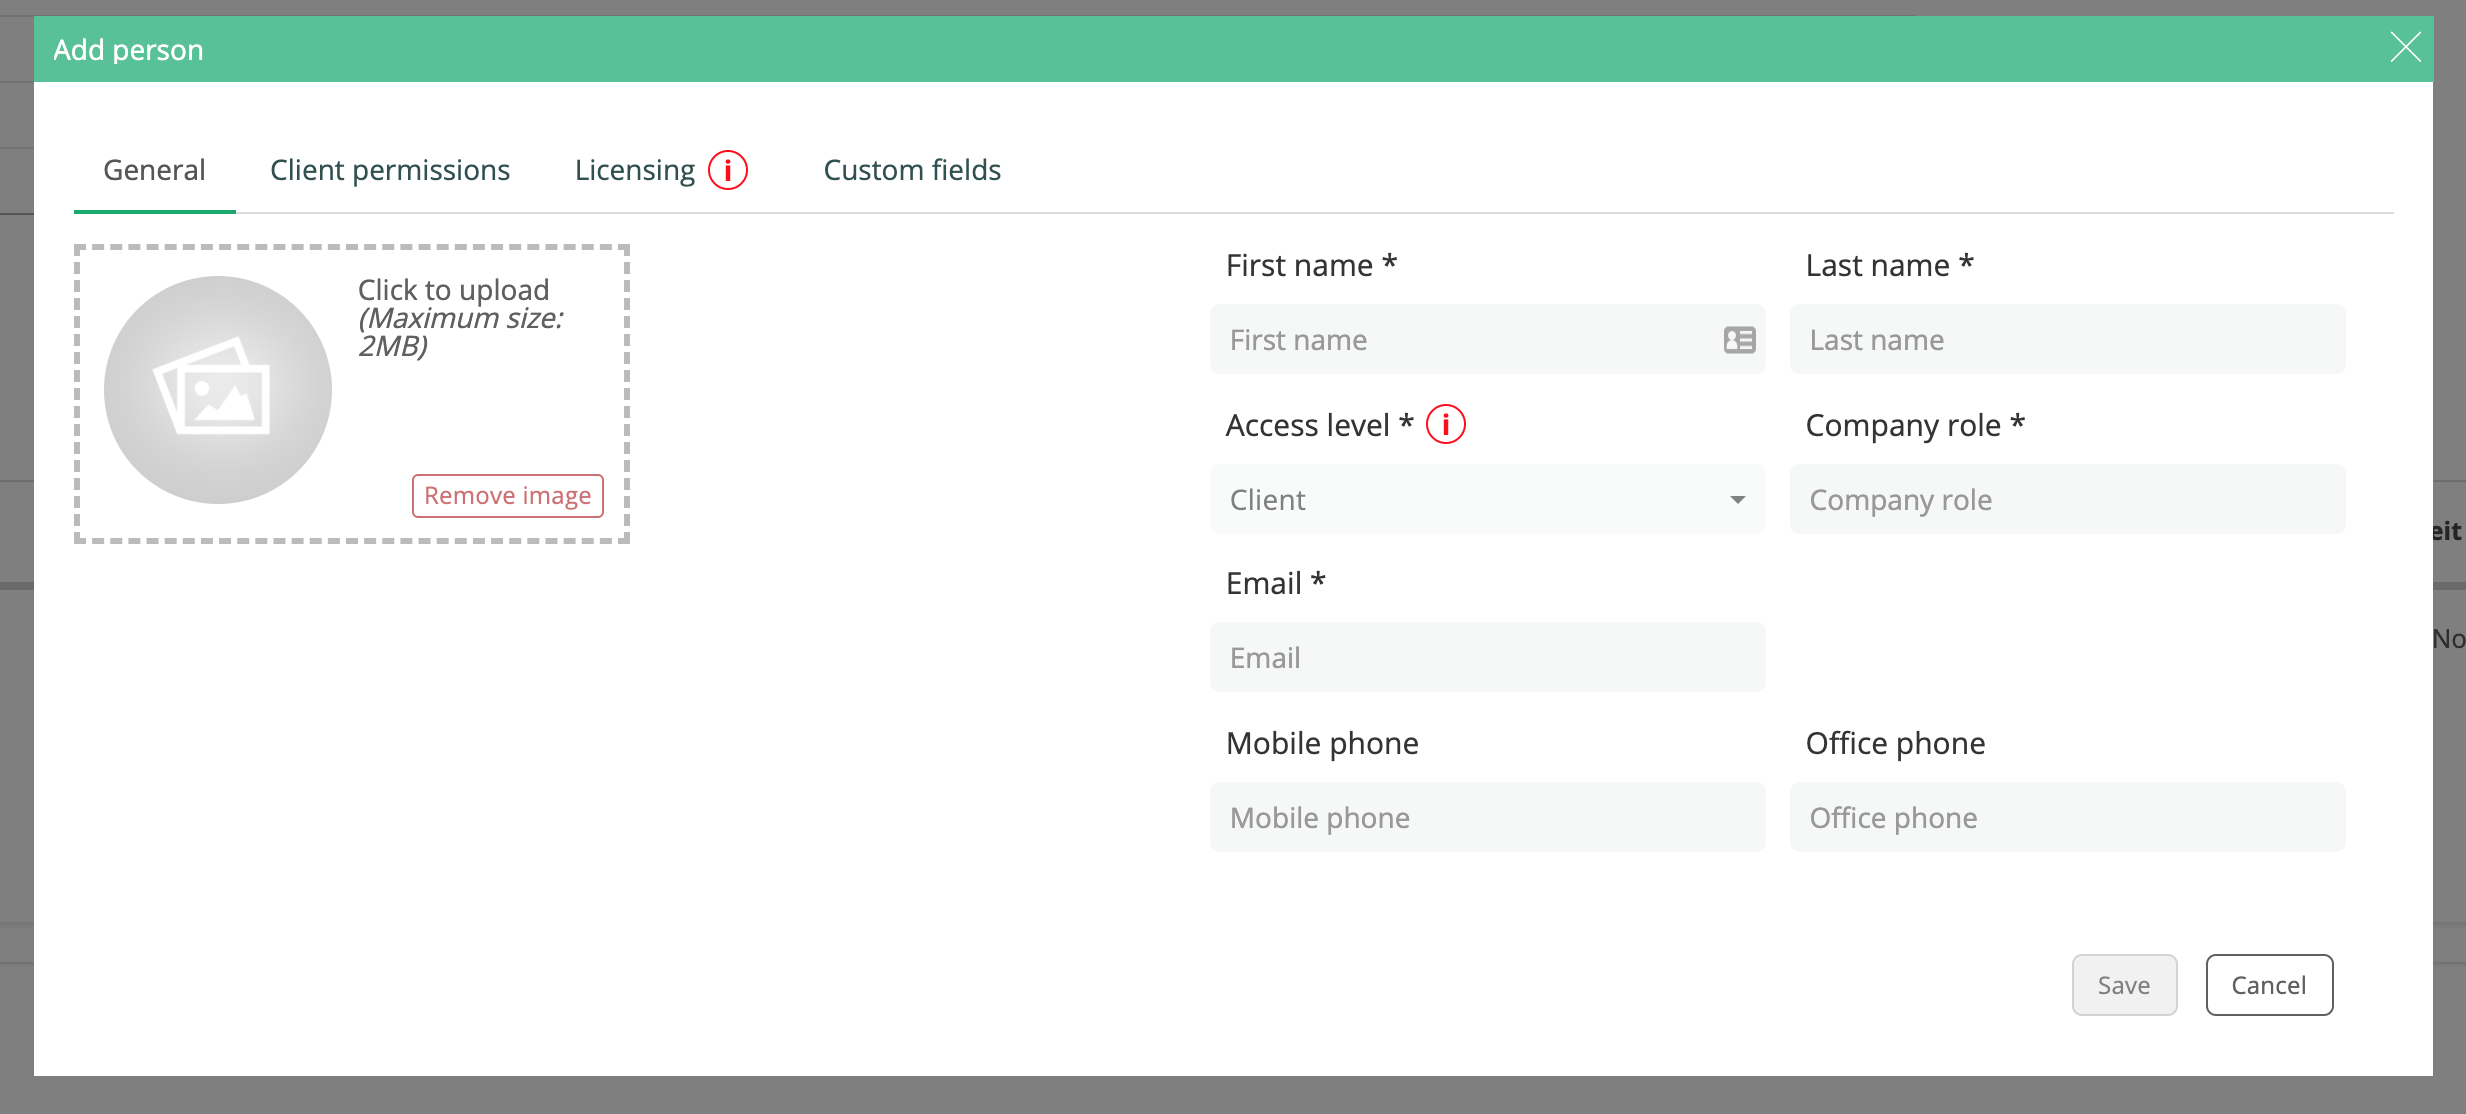
- Contact without access to elapseit – for this you will need to fill in some general information like name, role in the company, e

- Contact with Client access level, meaning that this person will have access in your account, and you decide what this person can see and what cannot see. Find out more about the Client access level here. By choosing this kind of contact, you add more information, creating a profile almost as the ones for your employees/contractors:
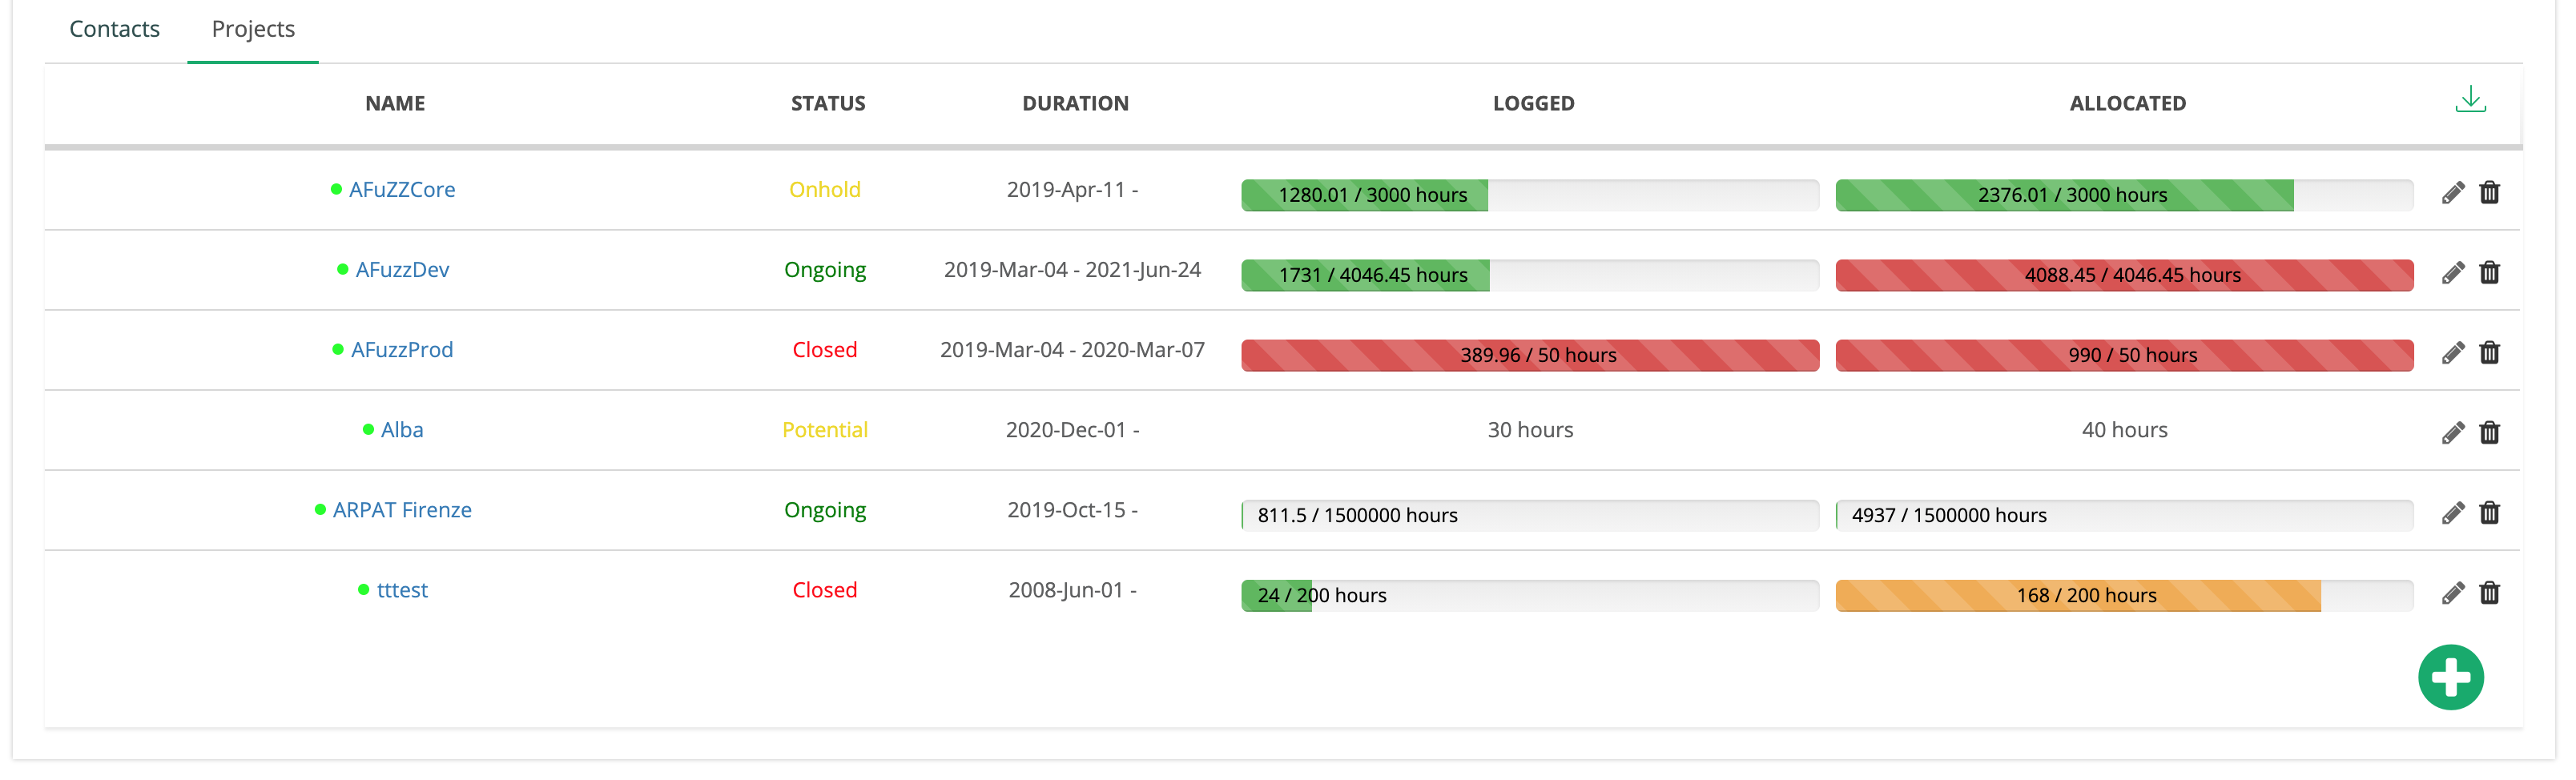
B. PROJECTS
At any time, on your Client page, you can see all the projects linked to this client, with their status and some quick statistics. With the plus, you can add a new project for this client directly from the Client page.